Increasing productivity in businesses is one of the most important things you need to work on. Too often businesses operate in different locations as different towns, countries and some big businesses operate on different continents. The internal business communication and information sharing among the people in the business is something that has a big impact on business productivity.
Faster decision making, fast information sharing, fast controlling, knowing the realization of the most important projects or activities, allocation of the project tasks… All of these activities can be implemented through one system – a small business intranet solution.
Wikipedia’s definition of intranet is:
A private network that uses Internet protocols to securely share any part of an organization’s information or operational systems within that organization. The term is used in contrast to the internet – a network between organizations – and instead refers to a network within an organization. Sometimes the term refers only to the organization’s internal website but maybe a more extensive part of the organization’s information technology infrastructure.
– Wikipedia
In this post, I want to cover one tutorial on how to set up Google’s sites as an intranet for small businesses.
1. If you don’t have Google Account create one
Probably you already have a Google account. But, if you don’t have, create one because it will give you access to really useful and important tools for your small business. One of these tools we will use as a small business intranet solution.
🚀 Warning
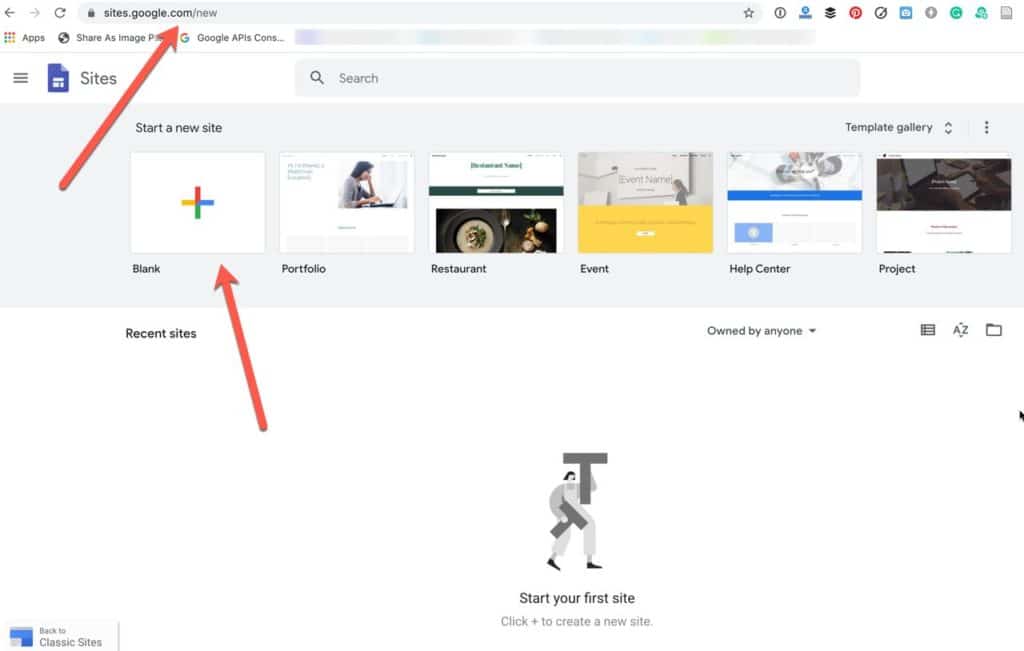
2. Sign in to Google Sites with your Google Account
The next step is to sign in to Google Sites with your Google account.
3. Create Site – Click on Create Site Button
4. Define the Basic Settings for Your New Intranet Solution
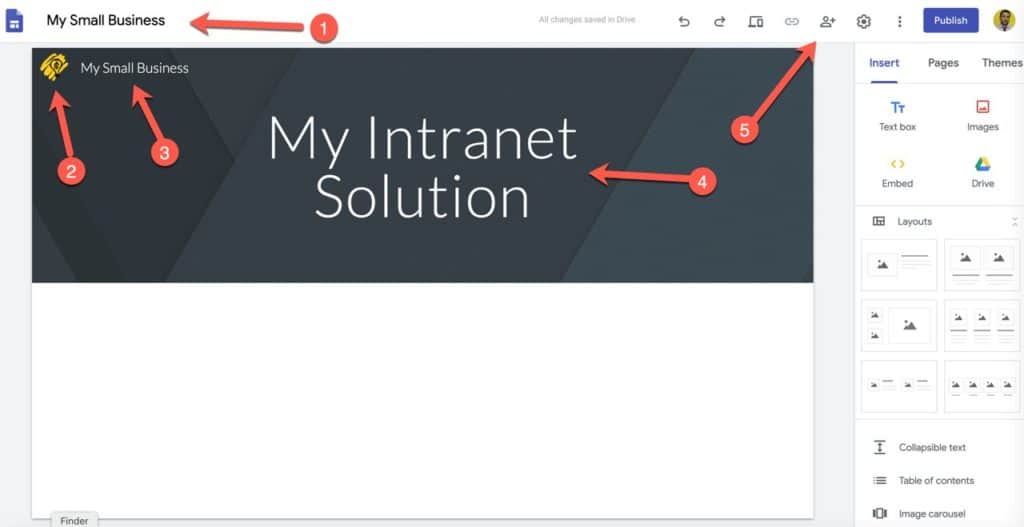
- Add the name of your site
- Add the logo of your company
- The name of your small business
- The name of your intranet solution
- Add the person who can access your new intranet solution (image below).
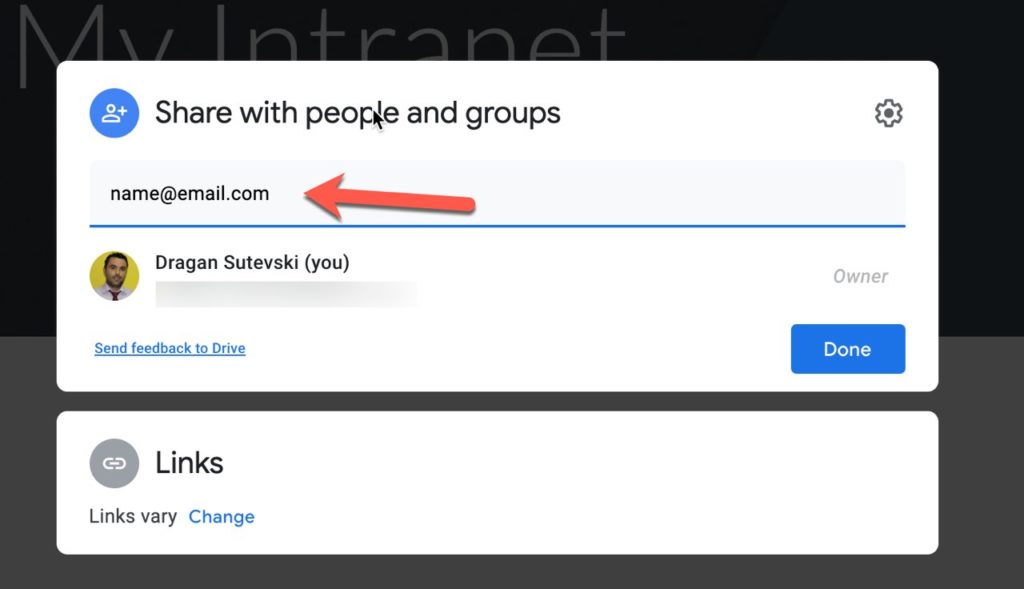
Because we want our site to be our business intranet solution, we will need to add the emails or other accounts that can access the content on our intranet solution. Now the site for our small business intranet solution is created. The next thing that we must choose is what we will want to have as an option in our intranet. Let’s say that we want to have these options in our intranet:
- Blog with the latest business information as an announcement.
- Document sharing place or as a storage place for the files.
- Project activities and realization.
There are too many possibilities about using Google sites as an intranet solution for the businesses, but I choose this 3 for the purpose of this tutorial.
5. Create Page for Blog With Latest Business Information
First, we will need to create a new page with the name “Announcements”.
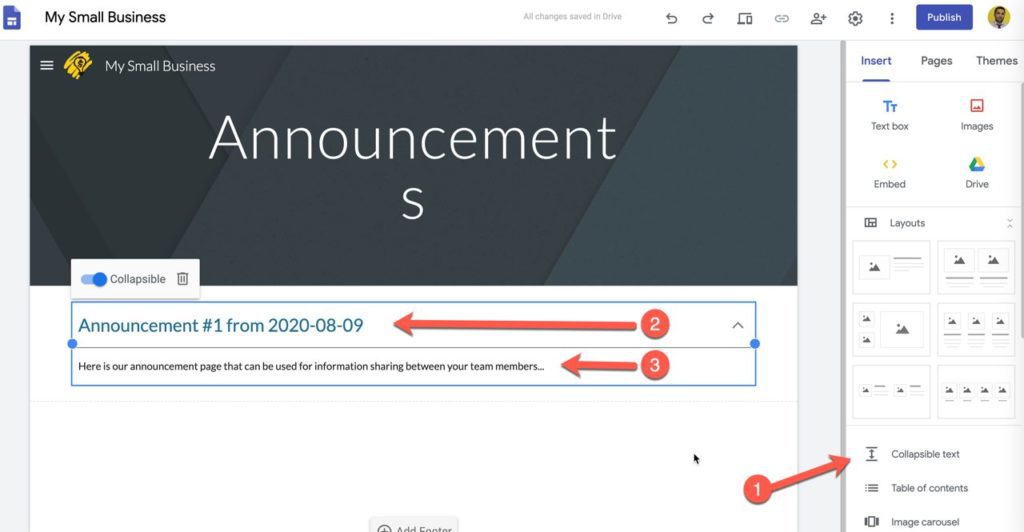
Next, we will add some of the text boxes from the right sidebar. In this case, I am using “Collapsable text” where I add the title of the announcement and the content of the announcement.
Now we have a new page named “Announcements” with the latest business information. When we want to add some business information we must some of the text boxes, headings or simply you can add Google Docs documents.
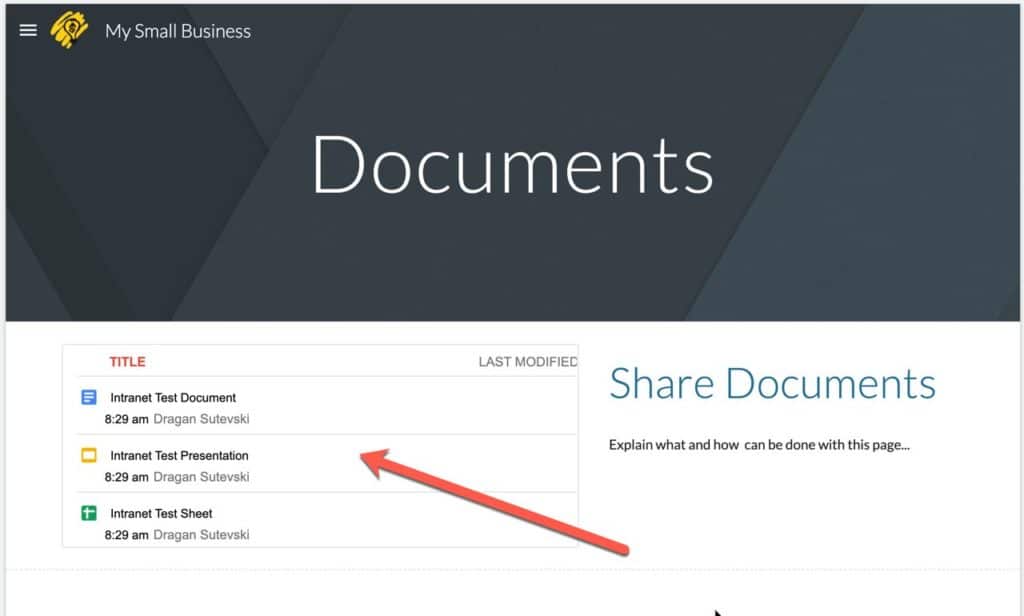
6. Create Place for Document Sharing
We can continue with creating a new page as in a previous case and name it as a “Documents” instead of “Announcements”.
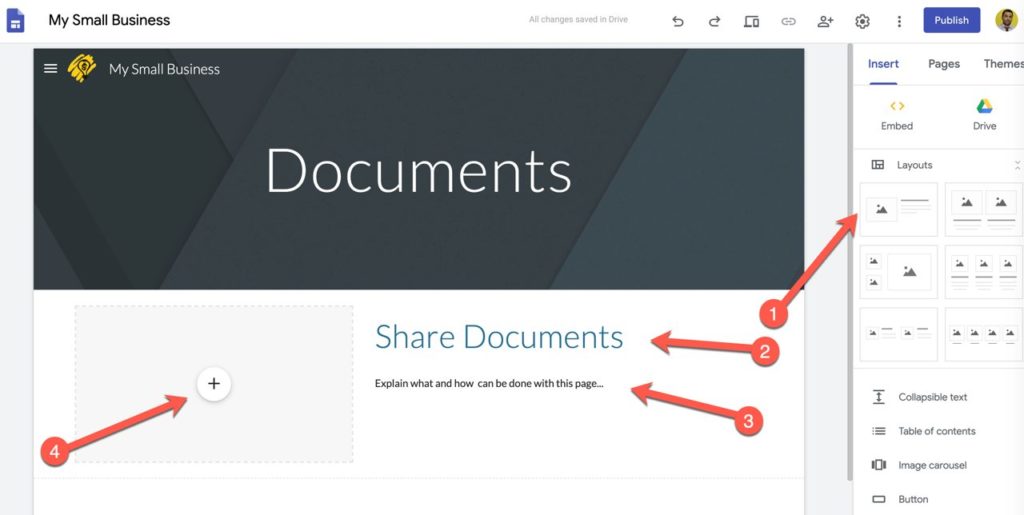
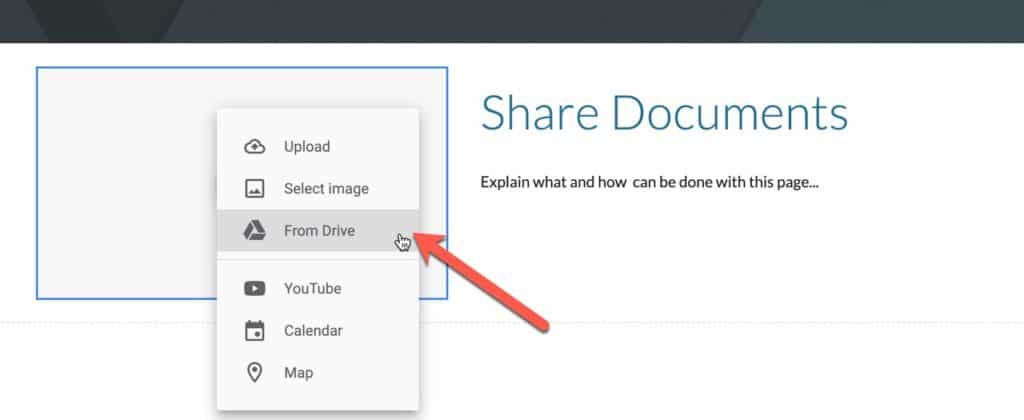
Because I want to add Google Drive Folder for this purpose, I have selected the first layout as shown on the screenshot, add title and explanation. The next thing I have to do is to insert the Google Drive Folder on this page clicking on the “+” button and select “From Drive” as shown in the image below.
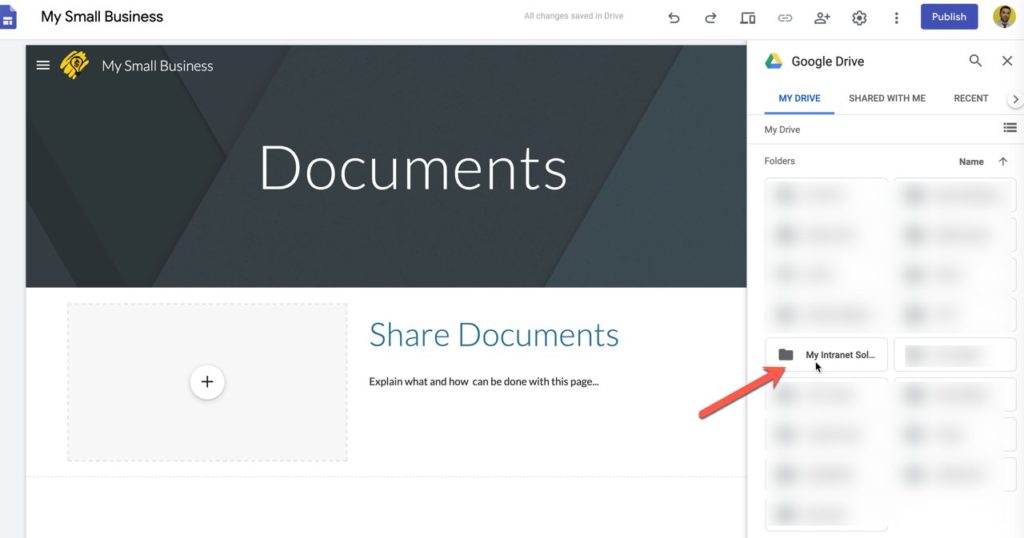
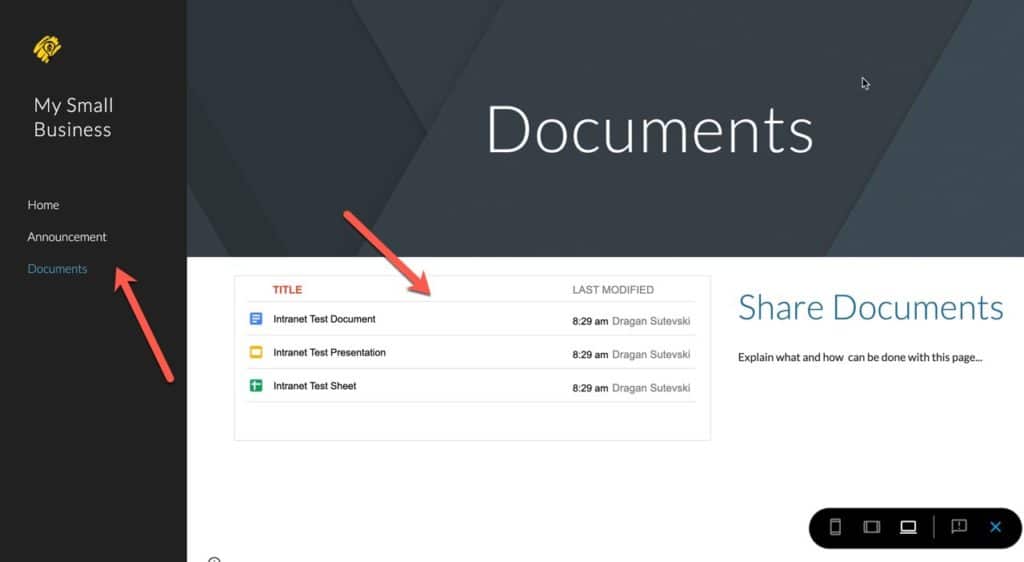
Now on the right sidebar we will have all our folders in Google Drive. I will need to select one that will have a specific purpose for our intranet solution. Don’t forget to add permissions inside Google Drive for this specific folder.
Now, all documents inside that specific folder in Google Drive will show on the left side of the page.
If we click on the “Preview” button we can see how our intranet solution will look on the web.
7. Create Page With the Project Activities and Realization
As in the first and second case, we start with creating a page with clicking on Create Page and name it as “Project Activities”.

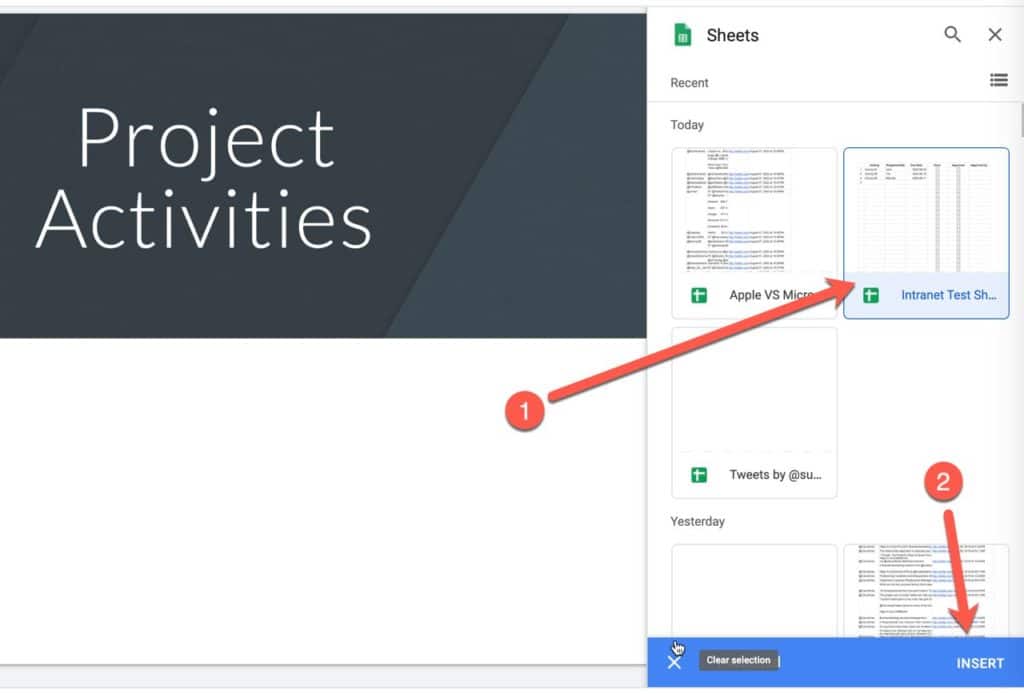
Next, we will need to prepare a Sheet in Google Drive that will have a list of all project activities, responsibilities, and the due dates for each activity. When we click on Insert Sheet, we will need to choose the right sheet that will need to be displayed on the page “Project Activities” inside our new intranet solution.
Now the sheet will be displayed on our page with all raws and columns defined inside Google Sheet.
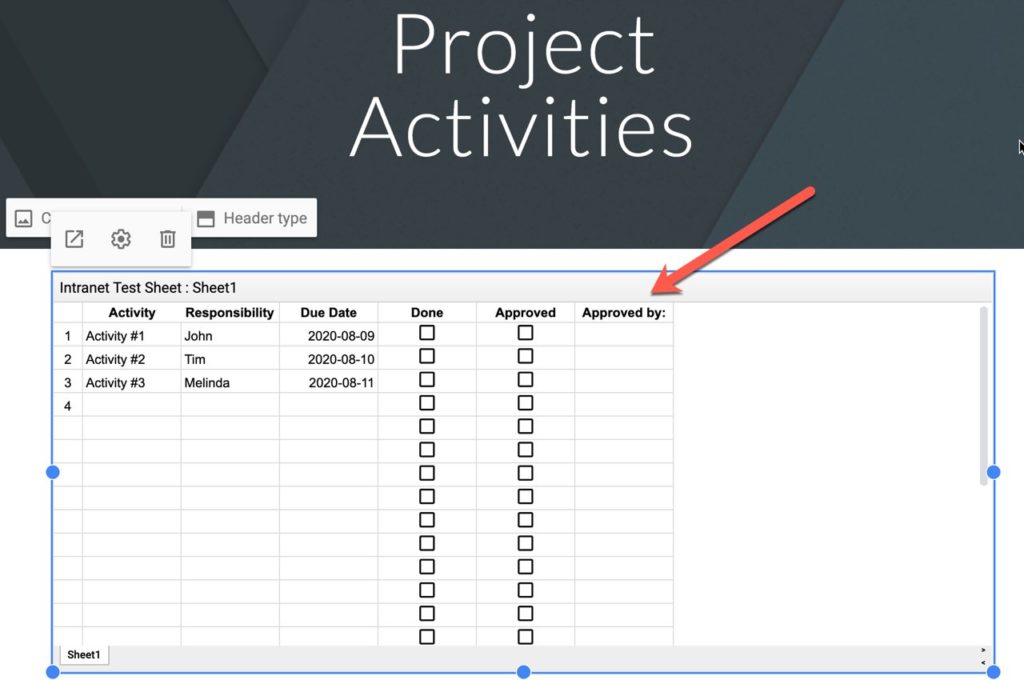
With this option, we can customize the data that we want to be included in our Project page.
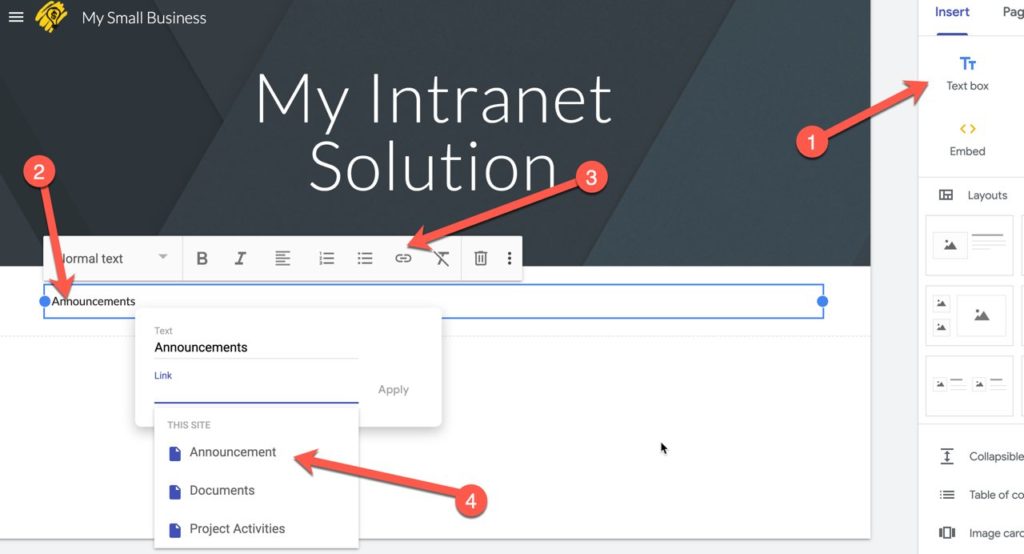
8. Add Links on the Home Page of Your Intranet Solution
For the quick opening of the desired page, it is good to link all important things inside the home page of your intranet solution.
That’s all! Now you have your simple small business intranet solution for your company. You can publish the page now.