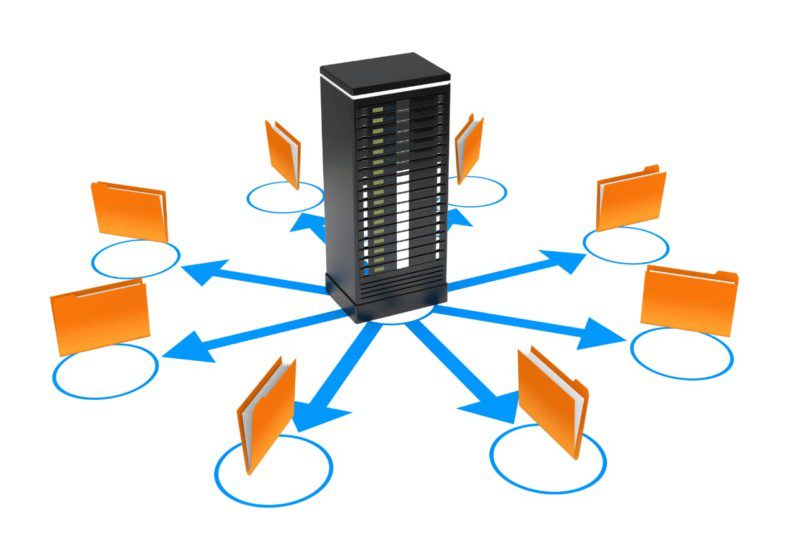
Shared hosting is a web service in which multiple web servers are linked via a computer network and controlled by a single administrative body.
In simpler terms, shared hosting allows many people to host their websites on the same server, with each user’s homepage experiencing the resources of that server rather than having its independent machine.
Shared hosting is one of the most cost-effective hosting solutions out there. This post will cover the definition of shared hosting, its uses, and what to look for when choosing one.
Uses of Shared Hosting:
- Anyone can use shared hosting to start their website or blog without worrying about being too small or powerful.
- An online community where people share an interest can be established instead of everyone having their site.
- A company can share its server with its employees rather than purchasing multiple servers.
- This might be used by companies who want to get the most from an internet presence without paying for the whole package; it is a good way of getting a website online without having to pay for expensive hardware.
- If you want your site linked to or included within a hosting provider’s directory, you can register and connect it too – though this will eat into your hosting account’s budget.
What you need to have:
You must have Internet access at a minimum. You will also need a browser (such as Internet Explorer or Firefox). You will need to be able to log into your hosting account to do anything.
Who can use shared hosting:
Anyone with a computer and a connection to the web can use shared hosting. This is the most suitable option if you want to start your own website. If you are part of an organization like your school, college, or company and need an entire dedicated server for your website, this is not a viable option.
Why can you start with shared hosting?
You have complete control over which code runs on your server; this means you can put onto your website whatever software or content you want without worrying about its security. As long as you have Internet access, this is enough to allow the functioning of many different types of software. There are no limitations on file types (for example .doc or .xls files) or the operating system (such as Linux). If you want to add e-mail functionality, plenty of free software programs can be installed on your account.
When you first look at the hosting accounts listed on a shared hosting provider’s website, there will often be no indication of what is included with the package – this is because there are so many different types of servers available, so many other aspects (such as support) that it would take too long to specify them all. The more specific a hosting account is aimed at, the more expensive it will typically be. If you are using a shared hosting account for your website, you can assume that these are included:
- Bandwidth: The amount of download traffic allowed through to your server’s Internet connection. It is measured in gigabytes per month, so if a website got 1GB of traffic every day, then it would use up all of its bandwidth after 30 days.
- Disk Space: The amount of space allotted to you on the server’s hard drive(s)
- E-Mail Accounts: How many e-mail accounts are included with your package, and what sort of features does each have? Different packages will offer different numbers of e-mail accounts and each account may have different features associated with it. These include the ability to forward mail, virus scanning, spam filtering, and so on.
- PHP: The amount of processing power available for scripting languages like PHP.
- MySQL: The amount of memory used for interpreting SQL statements used to access structured data like addresses or products.
In addition to this, you must be aware that your website’s server is also a host for many other websites afforded the same level of service as you receive; your website might not be exempt from downtime or slowness caused by technical issues affecting one or more of the sites hosted on your server.
How to get started with shared hosting?
You must register a domain name by finding an alternative to your ISP’s default domain. This is often the cheapest option available, so check if it is available before you go elsewhere. Then find a shared hosting provider and subscribe to the package that best suits your needs; you will then be able to upload your website onto the server using FTP. Most of this can be done online using a web-based interface, but some networking knowledge is also necessary.
1. Register a domain name
This is the first step to using shared hosting if you still need to get a domain name. Shared hosting accounts don’t have their unique domain names, so you would need to register a new one; this means that your website will end up being hosted on someone else’s server, but you are still able to access it through the URL of your domain name. You can choose any domain name you wish though it is advisable not to use company or school names as they may prevent other people from registering those names without the owner’s permission. If in doubt, choose something easy to remember, such as your first and last name, with an easily identifiable keyword at the end (like johnsite.com or teachersite.com).
2. Use FTP to upload your website to the hosting account
Once you’ve registered a domain name, you will need to change the settings on your web browser so that it points to the domain name (you can use any URL format you want, such as http://johnsite.com or https://teachersite.com). Once this is done, log into your hosting account and access the website management section for your hosting account; here, you will find a link called “FTP” which should now have an option next to it that says “Upload.” Select this and then upload all of your website’s files. If you used FTP to move the files onto your server earlier, you will need to copy them from your local computer (the one where you have been creating/editing the site until now) to the shared hosting account’s server.
3. Install an E-mail Client
If you want to receive e-mails sent to a specific e-mail address on your domain name, you should install an e-mail client on the server. The most commonly used are Microsoft Outlook and Microsoft Outlook Express, but there are a number of other clients available too, including Mozilla Thunderbird and Evolution though these may not always be free. You should also be aware that the size of each e-mail can be constrained under some services that allow you to send email; so if you are using a specific E-mail address, especially one which is not very common, then it may be advisable to use some free e-mail service.
4. Set up your website
The next step is to set up a special web page on your server that will contain your website’s home page. Update your DNS settings so that it points to this special page rather than the DNS entry for the shared hosting account – this will enable you to access it through any URL format such as https://johnsite.com, http://johnsite.com or http://www.johnsite.com (the different URL formats are commonly used by professionals and amateurs alike).
5. Set up a website to hold the accounts for your customers
This can be done by setting up an online application that will allow people to register with their password and account name before logging into their pages; this is the option that you would use if you were creating an online forum or a community website with accounts set up for individuals to use.